My latest project has been remodeling a home for a dear friend, preparing it for resale. The house is an early-1900s Craftsman in Minneapolis with absolutely beautiful original character—maple hardwood floors, deep statement trim, and the kind of architectural details that immediately make you want to preserve rather than replace.
The home has two bathrooms, and this is the main bath. Like many houses of this era, the footprint is modest, so every design decision had to work harder. The goal wasn’t simply to make the room feel updated—it needed to feel memorable while still remaining clean, timeless, and true to the period of the home.
I’ve been wanting to create a custom hex mosaic bathroom floor for years, and this project finally felt like the perfect opportunity. Historic hex tile has such a strong connection to early American bathrooms, but I wanted to reinterpret it in a way that felt elevated and intentional rather than overly traditional. The result is a custom mosaic pattern designed to feel collected, handcrafted, and fully integrated with the original character of the house.
Below were my primary inspiration images—and the starting point for bringing this bathroom to life.
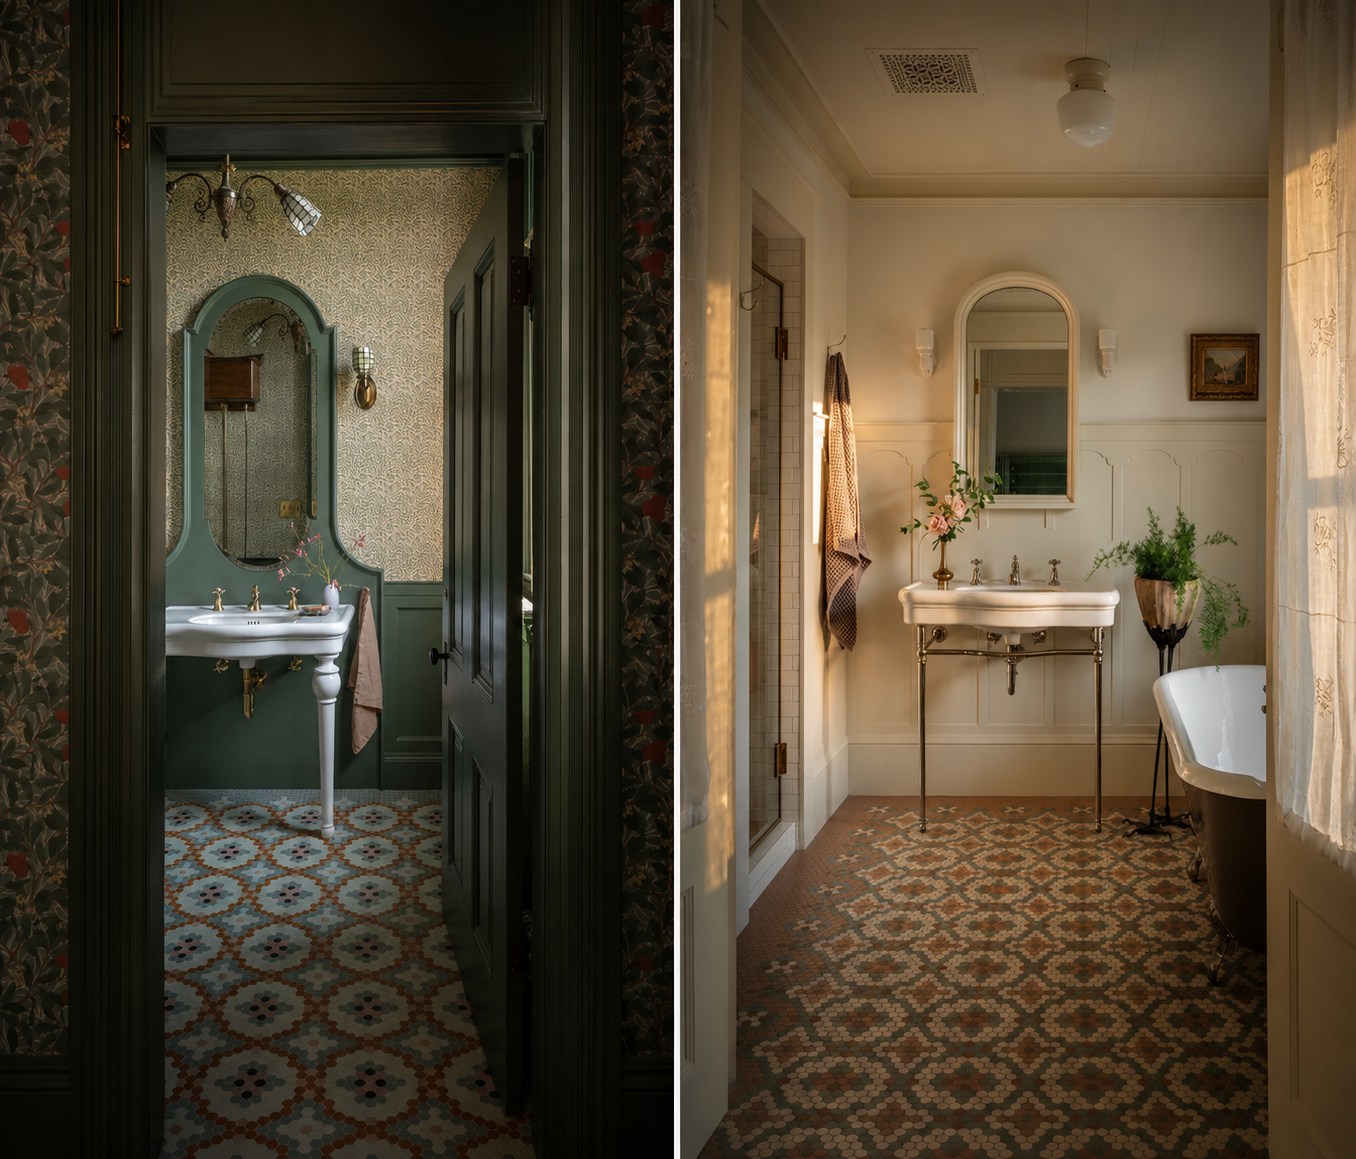
The first place I looked was Subway Ceramics—the source of the tile used in many of my inspiration images. I ordered samples and they truly were beautiful: stunning shades, incredible quality, and exactly the kind of detail that makes historic bathrooms feel authentic.
That said, this project is ultimately a thoughtful resale—not a luxury renovation—and I wanted to be intentional about where the budget was spent. After more searching, I discovered Cemento Tile, which ended up being a perfect fit.
Interestingly, their color palette was completely different from what I originally envisioned. Instead of muted historic tones, they offered richer jewel tones that felt especially complementary to this house’s dark Craftsman trim and overall character. The deeper colors gave the design a little more personality while still feeling period-appropriate.
After ordering samples, I narrowed the palette down to five colors, choosing a deep green as the field tile. I expected calculating quantities for a custom mosaic to be the hardest part of the process—but it ended up being surprisingly simple. I ordered enough of the green tile to cover the full bathroom footprint, then one box each of the accent colors for the pattern (helped by the fact that there weren’t endless quantity options available—which, honestly, I love. Sometimes the best design decisions are the ones already made for you).
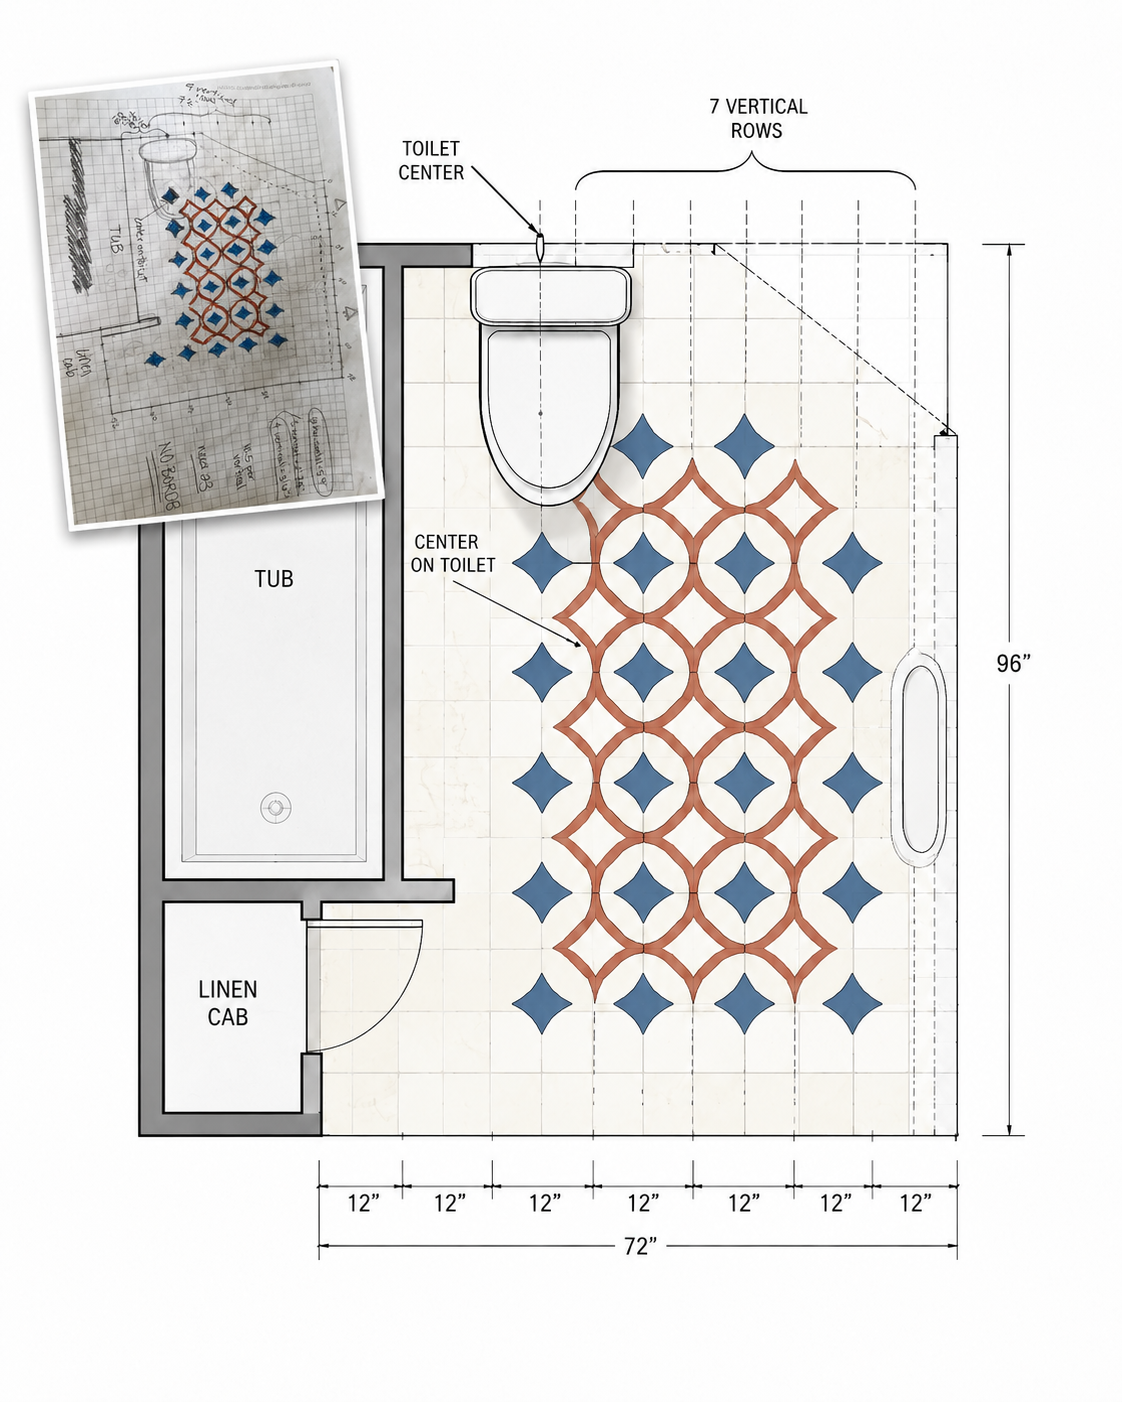
After deciding on the actual repeating pattern, the next challenge was figuring out how it would lay out within the room. This part felt similar to planning wainscoting—conceptually simple, but in reality it takes a surprising amount of trial and error to get the spacing and alignment to feel intentional.
My original plan was to frame the entire pattern with a border, but the angled doorway made that impossible. Honestly, that doorway was the biggest design challenge of the whole floor—rectangles are so much easier to work with.
To make the layout feel balanced, I started by centering the toilet on the pattern and intentionally placing an extra “flower” detail centered near the linen cabinet (which I’m not sure if I’m actually keep – TBD). From there, it became a lot of sketching, shifting, erasing, and reworking until everything landed in the right place.
After more iterations than I’d like to admit, I finally arrived at a layout that felt balanced, intentional, and true to the character of the house!
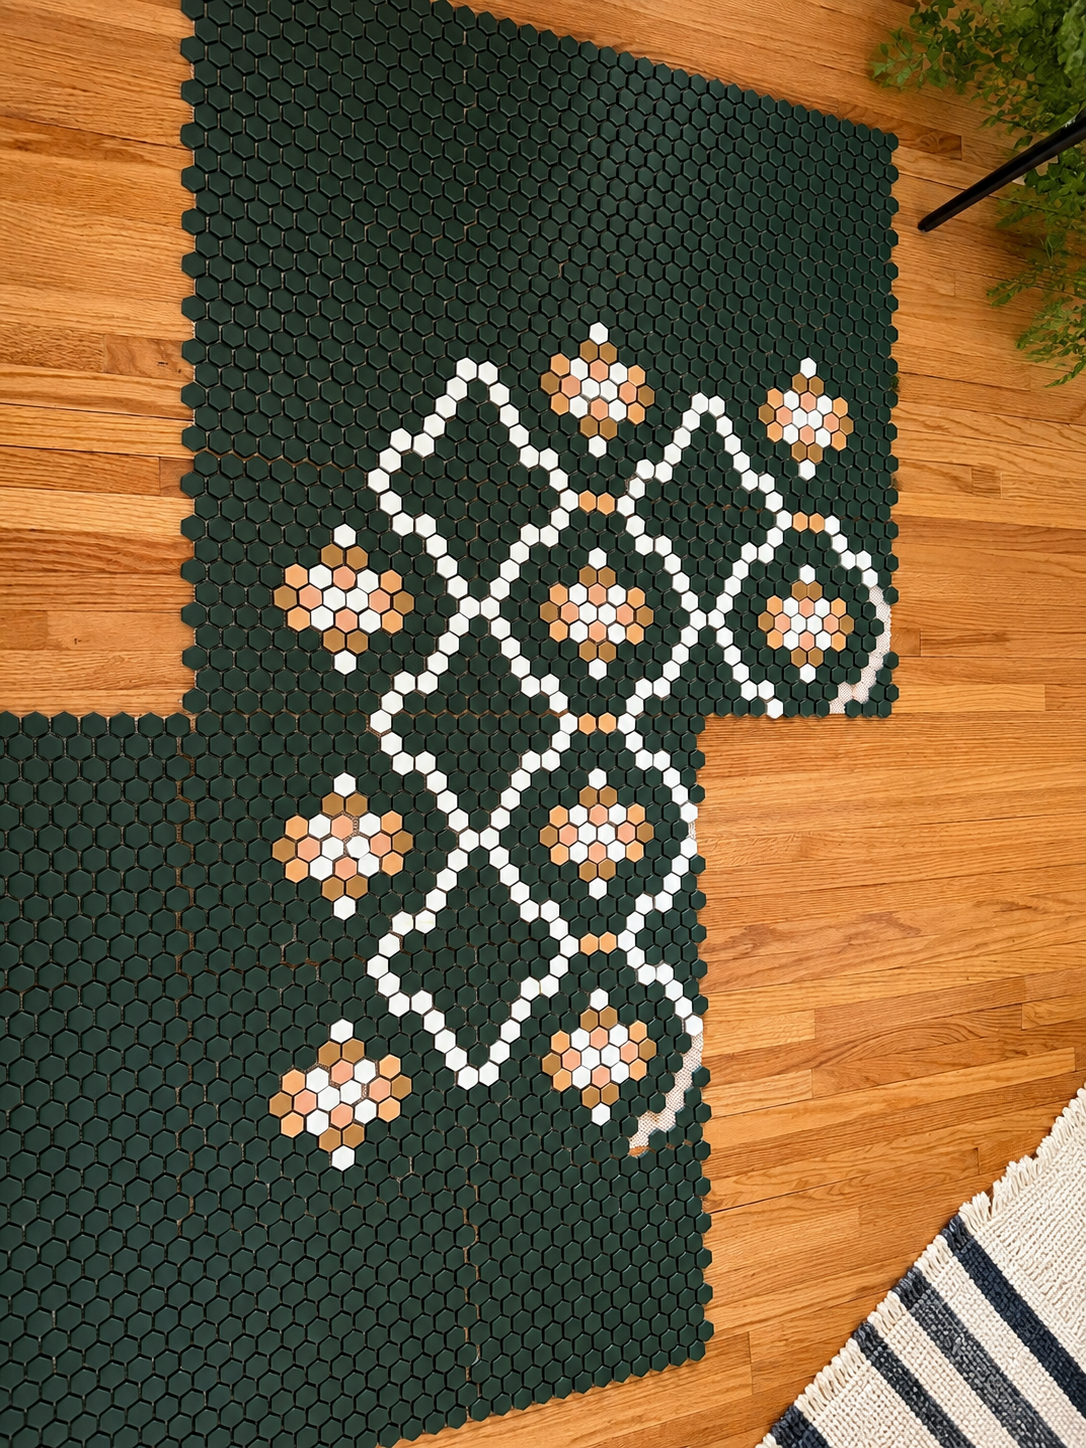
Then it was finally time to see the floor come to life.
I started by taking a single sheet of the green hex mosaic and building out the template for the custom pattern. One quick tip if you ever attempt something similar: if you need to remove tiles from the mesh backing, soak the sheet in hot water for 10–15 minutes first. It makes popping the tiles off dramatically easier and saves a surprising amount of frustration.
Once the template was finalized, I recreated the remaining 23 pattern sheets—which was every bit as painful as it sounds.
After all of the sheets were assembled, I dry-laid the entire floor in the proposed layout to make sure the scale, spacing, and alignment felt right in the room. A few final adjustments later, and I landed on the pattern you see above—the final version of this custom mosaic floor!
So there you have it—the planning, pattern development, and prep work behind this custom mosaic floor.
Now comes the fun part: installation starts this week. After all the sketching, sample ordering, layout adjustments, and assembling 23 custom sheets by hand, I’m excited (and slightly nervous) to finally see it come together in the actual space.
Wish us luck—and hopefully my tiler still speaks to me by the end.